
[React] 리액트와 개발환경, 컴포넌트 만들기, 이벤트
Posted: Updated:
React(리액트)
facebook.com 의 UI를 더 잘 만들기 위해 페이스북에서 만든 Javascript UI 라이브러리이다.
컴포넌트
웹사이트는 정보가 조금만 증가해도 그 정보를 표현하는 html이 기하급수적으로 복잡해진다.
눈으로 보기에 복잡해보이지 않아도 실제로는 코드가 굉장히 복잡하다.
리액트는 복잡한 코드를 정리정돈할 수 있도록 사용자 정의 태그를 만들 수 있게 해준다.
리액트에서 사용자 정의 태그를 컴포넌트 라고 부른다.
컴포넌트의 기능
가독성을 획기적으로 높일 수 있다.
재사용성이 높아진다.
유지보수가 편리해진다.
개발 환경
공식 문서에서 개발 환경을 어떻게 세팅하는지 찾아볼 수 있다.
Online Playgrounds
온라인 상에서 리액트 어플리케이션을 구현해볼 수 있다.
예를 들어 CodeSandbox 가 있다.
Add React to a Website
웹 사이트를 가지고 있다면 처음부터 끝까지 리액트 앱으로 만드는 것이 아니라 부분적으로 리액트 기능을 추가하고 싶을 때 사용하는 옵션이다.
Create a New React App
`Tool Chain 을 활용한다.
Tool Chain은 리액트로 앱을 개발할 때 필요한 여러 개발 환경, 도구 등을 잘 모아서 한 방에 제공해주는 편리한 도구들이다.
create-react-app
Tool Chain 중에 하나이다.
설치를 위해 npm 이 필요하다.
npm install -g create-react-app
npm
npm이란 Node.js 를 이용해서 만들어진 여러가지 앱들을 손쉽게 설치할 수 있도록 도와주는 도구이다.
사용을 위해 Node.js 를 설치한다.
코드 작성하고 실행하기
editor 활용하기: visual studio code
Microsoft에서 만든 무료 프로그램이다.
command line 명령어로 컴퓨터를 제어할 수 있는 프로그램이 내부적으로 설치되어 있다.
create-react-app 으로 개발환경을 만들면 terminal에서 npm run start 명령을 통해 실행시킬 수 있다.
ctrl + C 를 누르면 실행을 종료할 수 있다.
Directory 구조
크게 src 와 public 이라는 디렉토리가 있다.
public 에는 index.html 이 있다.
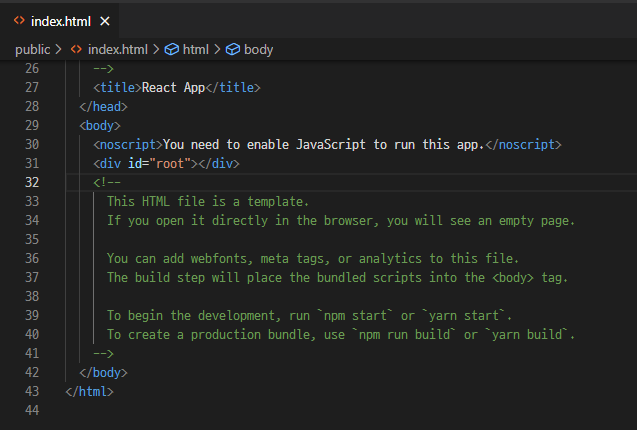
<div id="root"> </div>
리액트를 통해서 만들어낸 컴포넌트들은 id가 root인 태그 안에 들어가게 된다.
이 안에 들어가는 컴포넌트들은 src 디렉토리 안에 있는 파일들이다.
이후 개발을 할 때 대부분의 파일은 src 디렉토리 안에 넣게 되며, entry 파일은 index.js 파일이다.
ReactDOM.render( <APP/> , document.getElementById('root') );
<APP/> 이라는 것이 리액트를 통해 만든 사용자 정의 태그, 즉 컴포넌트이다.
import App from './App';
<APP/> 컴포넌트의 실제 구현은 import 를 통해 불러온 src 안의 App.js 파일이다.
css를 수정하고 싶은 경우 index.js 에 import 되어 있는 index.css 파일을 수정하면 된다.
배포
빌드 시 npm run build 명령을 사용하면 build 라고 하는 파일이 추가된다.
이 안에 있는 index.html 은 불필요한 용량을 차지하는 정보를 제거했기 때문에 공백이 하나도 없는 상태이다.
이와 같이 실제로 서비스할 때는 build 안에 있는 파일들을 사용한다.
Web Server가 문서를 찾는 최상위 디렉토리 Document root 에 build 디렉토리 안에 있는 파일들을 위치시키면 실서버 환경이 완성딘다.
serve
npm을 통해 설치할 수 있는 간단한 웹서버이다.
npx serve -s build
위 명령을 통해 한 번만 실행시킬 웹서버를 다운로드 받을 수 있다.
-s build 옵션은 build 디렉토리를 document root 로 하는 옵션이다.
웹서버로 접속할 수 있는 주소를 확인한 뒤 localhost:5000 으로 접속한다.
컴포넌트
class App extends Component {
  render() {
    return (
      <div className="App">
        Hello, React!!
      </div>
    );
  }
}
App 이라는 클래스를 만들고, 컴포넌트라고 하는 리액트가 갖고 있는 클래스를 상속하여 새로운 클래스를 만든다.
이는 render 라고 하는 메서드를 가지고 있다.
class Subject extends Component {
  render() {
    return (
      <header>
        <h1>WEB</h1>
        world wide web!
      </header>
    );
  }
}
클래스는 대문자로 시작하며, 컴포넌트는 반드시 하나의 최상위 태그만 사용해야 한다.
Subject 에서는 header 태그가 최상위 태그이다.
따라서 <header> 부분을 Subject 라는 이름의 태그로 정의했다.
<subject> 태그를 추가하면 div class 가 App 인 태그 안쪽에 <header> 라는 태그가 생긴다.
props
class Subject extends Component {
  render() {
    return (
      <header>
        <h1>{this.props.title}</h1>
        {this.props.sub}
      </header>
    );
  }
}

class Content extends Component{
  render(){
    return(
      <article>
        <h2>{this.props.title}</h2>
        {this.props.desc}
      </article>
    );
  }
}

class App extends Component {
  render() {
    return (
      <div className="App">
        <Subject title="WEB" sub="world wide web!"></Subject>
        <Content title="HTML" desc="HTML is HyperText Markup Language."></Content>
      </div>
    );
  }
}
속성을 사용해서 텍스트를 지정하도록 할 수 있다.
HTML에서 속성이라고 하는 것은 리액트에서 props 라고 한다.
이를 활용해서 코드의 재사용성을 높일 수 있다.
Debugging
리액트 홈페이지에 “Community” -> “Tools” 부분에 Debugging 라는 도구로 현재 리액트로 만들어진 앱의 상태를 확인할 수 있다.
“크롬에 설치” 를 클릭하여 설치한 후 React Debugger 라는 툴을 설치한다.
개발자 도구에서 React 탭을 통해 리액트 컴포넌트를 볼 수 있다.
컴포넌트 파일로 분리하기
import React, { Component } from 'react';
Component 클래스를 로딩해야 한다.
export default TOC;
외부에서 사용할 수 있도록 허용할 것인가를 export 를 통해 작성한다.
import TOC from "./componets/TOC";
외부에서 사용할 때는 import 로 로딩한다.
state
props 의 값에 따라 내부의 구현에 필요한 데이터들이다.
props 와 state 는 철저하게 분리되어 있어야 한다.
<Subject title="WEB" sub="world wide web!"></Subject>
하드코딩된 props 의 값을 state 로 바꾸어 코드를 개선한다.
constructor (props){
  super(props);
  this.state = {
    subject : { title : 'WEB' , sub : 'World Wide Web!' }
  }
}
this.state={} 코드를 통해 state 값을 초기화시킨다.
this.state 에 Subject props의 값으로 객체를 부여한다.
<Subject title={this.state.subject.title} sub={this.sate.subject.sub}></Subject>
props 의 데이터를 state 에서 가져오도록 수정한다.
정보 은닉
내부적으로 state 값이 subject 가 있는지 알 수 없다.
외부에서 알 필요가 없는 정보를 은닉할 수 있다.
여러가지 값을 다룰 때
constructor (props){
  super(props);
  this.state = {
    subject : { title : 'WEB' , sub : 'World Wide Web!' }
    contents : [
      {id : 1 , title : 'HTML' , desc : 'HTML is for information'},
      {id : 2 , title : 'CSS' , desc : 'CSS is for design'},
      {id : 3 , title : 'JavaScript' , desc : 'JavaScript is for interactive'},
    ]
  }
}
대괄호로 배열을 표시한다.
<TOC data={this.stat.contents}></TOC>
배열 이름을 주입시킨다.
class TOC extends Component{
  render(){
    var lists=[ ];
    var data=this.props.data;
    var i=0;
    while( i < data.length ) {
      lists.push( <li key={data[i].id}><a href={"/content"+data[i].id}>{data[i].title}</a></li>);
      i=i+1;
    }
    return(
      <nav>
        <ul>
          {lists}
        </ul>
      </nav>
    );
  }
}
<li> 태그를 하나씩 생성하면서 <lists> 변수에 담고 반환시킨다.
이때, key 를 지정하지 않으면 에러가 발생하므로 key 라고 하는 props 를 지정해준다.
엘리먼트를 여러개 자동으로 생성하는 경우에는 식별자 를 key 를 통해 적어줘야 한다.
이벤트
render 함수는 어떤 HTML을 그릴 것인가를 결정한다.
리액트에서는 props 의 값이나 state 값이 바뀌면 해당되는 컴포넌트의 render 함수가 호출된다.
render 함수가 다시 호출됨이 따라 render 함수 하위의 컴포넌트들의 render 함수도 호출된다.
따라서 화면이 다시 그려진다.
constructor (props){
  super(props);
  this.state = {
    subject : { title : 'WEB' , sub : 'World Wide Web!' }
    contents : [
      {id : 1 , title : 'HTML' , desc : 'HTML is for information'},
      {id : 2 , title : 'CSS' , desc : 'CSS is for design'},
      {id : 3 , title : 'JavaScript' , desc : 'JavaScript is for interactive'},
    ],
    mode : 'welcome',
    welcome : {title : 'welcome', desc : 'Hello, React!!'},
  }
}
mode 의 기본값은 welcome 으로 하고, mode 가 welcome 일 때 content 영역에 표시할 텍스트를 지정한 코드이다.
render() {
  var _title,_desc=null;
  if (this.state.mode === 'welcome') {
    _title = this.state.welcome.title;
    _desc = this.state.welcome.desc;
  } else if( this.state.mode === 'read') {
    _title = this.state.contents[0].title;
    _desc = this.state.contents[0].desc;
  }
  return (
    <div className="App">
      <Subject title={this.state.subject.title} sub={this.sate.subject.sub}></Subject>
      <TOC data={this.state.contents}></TOC>
      <Content title={_title} desc={_desc}></Content>
    </div>
  );
}
render 함수에 조건문을 사용하여 mode 의 값에 따라 컴포넌트의 rendering 결과가 달라지게 하는 코드이다.
<header>
     <h1><a href="/" onClicn{function () {
         alert( 'Hi' );
      }>{this.state.subject.title}</a></h1>
     {this.state.subject.sub}
</header>
<a> 라는 링크를 클릭할 때 어떤 자바스크립트 코드가 실행되도록 이벤트를 구현한 코드이다.
이때 자바스크립트의 onclick 대신 리액트의 onClick 을 사용한다.
이 코드 실행 시 페이지가 reload 되므로, reload 되지 않도록 기본 동작을 막아야 한다.
<header>
     <h1><a href="/" onClicn{function (e) {
         console.log(e);
         e.preventDefault();
         alert( 'Hi' );
      }>{this.state.subject.title}</a></h1>
     {this.state.subject.sub}
</header>
e.preventDefault();
위 코드를 통해 이벤트가 발생한 태그의 기본적인 동작을 못하도록 막을 수 있다.
위에서는 최종적으로 링크를 클릭할 때마다 e 의 정보를 console 에 출력하고, preventDefault() 함수를 통해 페이지가 이동되지 않도록 한다.
<header>
     <h1><a href="/" onClicn{function (e) {
         console.log(e);
         e.preventDefault();
         this.setState({
           mode:'welcome'
         });
      }.bind(this)}>{this.state.subject.title}</a></h1>
     {this.state.subject.sub}
</header>
이벤트 함수 내에서 this 가 컴포넌트 자기 자신을 가리키도록 bind(this) 를 추가해야 한다.
this.state.mode ='welcome' 를 통해 값을 수정하면 리액트는 알지 못한다.
따라서 리액트가 state 의 값이 바뀐 사실을 알 수 있도록 this.setState() 함수를 호출할 때 mode를 수정한다.
✔ constructer() 함수에서는 this.state.mode ='welcome' 처럼 작성해도 상관 없다.
컴포넌트 이벤트
class Subject extends Component {
  render() {
    return (
      <header>
        <h1><a href="/" onClick={function(e){
           e.preventDefault();
           this.props.onChangePage();
         }.bind(this) } >{this.props.title}</a></h1>
        {this.props.sub}
      </header>
    );
  }
}
링크를 클릭하여 onClick 이벤트가 실행될 때 함수가 실행된다.
e.preventDefault(); 를 통해 페이지가 바뀌는 것을 막는다.
이후 <subject> 컴포넌트의 onChangePage() 함수를 호출한다.
constructor(props){
  super(props);
  this.state = {
    mode:'read',
    selected_content_id: 2,
    subject:{title:'WEB', sub:'World Wide Web!'},
    welcome:{title:'Welcome', desc:'Hello, React!!'},
    contents:[
      {id:1, title:'HTML', desc:'HTML is for information'},
      {id:2, title:'CSS', desc:'CSS is for design'},
      {id:3, title:'JavaScript', desc:'JavaScript is for interactive'}
    ]
  }
}
selected_content_id 를 2로 설정해서 기본적으로 2번 content 가 선택되도록 할 수 있다.
render() {
  var _title,_desc=null;
  if (this.state.mode === 'welcome') {
    _title = this.state.welcome.title;
    _desc = this.state.welcome.desc;
  } else if(this.state.mode === 'read'){
    _title = this.state.contents[0].title;
    _desc = this.state.contents[0].desc;
    var i = 0;
    while(i < this.state.contents.length){
      var data = this.state.contents[i];
      if(data.id === this.state.selected_content_id) {
        _title = data.title;
        _desc = data.desc;
        break;
      }
      i = i + 1;
    }
  }
  return (
    <div className="App">
      <Subject
        title={this.state.subject.title}
        sub={this.sate.subject.sub}
        onChangePage={ function() {
          this.setState( {mode: 'welcome'} );
          }.bind(this) }> </Subject>
      <TOC
        onChangePage={function(id){
          this.setState({
            mode:'read',
            selected_content_id: Number(id)
          });
        }.bind(this)}
        data={this.state.contents}
      ></TOC>
      <Content title={_title} desc={_desc}></Content>
    </div>
  );
}
read 모드일 때 반복문을 수행하여 현재 순번에 해당하는 content 를 표시되게 한다.
<TOC> 컴포넌트 list의 onChangePage 가 발생했을 때 this.setState 를 이용해서 mode 값과 함께 selected_content_id 의 값을 변경하면 된다.
function(id) 로 onChangePage() 함수를 실행시킬 때 항목의 id 값을 넘겨준다.
<TOC> 컴포넌트에서 넘어오는 값을 selected_content_id: Number(id) 와 같이 Number() 를 활용해 숫자로 바꿔준다.
class TOC extends Component{
  render(){
    var lists=[ ];
    var data=this.props.data;
    var i=0;
    while( i < data.length ) {
      lists.push(
        <li key={data[i].id}>
          <a
          href={"/content/"+data[i].id}
          data-id={data[i].id}
          onClick={function(e){
            e.preventDefault();
            this.props.onChangePage(e.target.dataset.id);
          }.bind(this)}
          >{data[i].title}</a>
        </li>);
      i=i+1;
    }
    return(
      <nav>
        <ul>
          {lists}
        </ul>
      </nav>
    );
  }
}
data-id = {data[i].id} 와 같은 속성을 주고 로드해서 해당하는 id 값을 확인할 수 있다.
이벤트가 발생한 태그를 가리킬 때는 target 을 사용하며, 이를 통해 <a> 태그를 알아내고 <a> 태그가 가리키는 data-id 값에 접근할 수 있다.
data- 로 시작되는 속성은 dataset 이라고 하는 형태로 접근할 수 있다.
data-id 속성을 사용하므로 접미사 id 를 사용하여 this.props.onChangePage(e.target.dataset.id); 와 같은 형식으로 사용한다.
이렇게 하면 WEB 클릭 시 mode 가 welcome 이 되고 목록을 클릭하면 mode 가 read 가 되어 selected_content_id 바뀌므로 본문 내용도 바뀌게 된다.
속성을 이용하지 않고 하는 방법
<li key={data[i].id}>
     <a
         href={"/content/"+data[i].id}
         data-id={data[i].id}
         onClick={function(id, e){
            e.preventDefault();
            this.props.onChangePage(id);
         }.bind(this, data[i].id)}
     >{data[i].title}</a>
</li>
bind(this,data[i].id) 처럼 bind(this) 의 두번째 인자로 data[i].id 값을 주면 된다.
onClick 이벤트에서 실행되는 함수의 첫번째 매개변수 값이 bind 의 두번째 인자 값인 data[i].id 가 된다.
댓글남기기